How to fish a crawler harness for walleye
Catching walleye can feel like a real mystery sometimes, can't it? You hear about anglers pulling in these incredible fish, and you're out there trying everything, feeling like you're missing a crucial piece of the puzzle. If you're tired of guessing and want to dial in a proven method for enticing those elusive West Virginia walleye, then mastering the crawler harness is exactly what you need. This guide is going to walk you through everything, from rigging to retrieving, so you can confidently hit the water and bring more walleye to your net.
Understanding the Walleye's Appeal for Crawler Harnesses
Walleye are known for being a bit particular, sometimes almost finicky. They often hug the bottom, preferring cooler, deeper water, and they have excellent low-light vision, making them formidable predators in stained or turbid conditions. Because of this, presenting a natural, enticing bait that moves slowly and stays in their strike zone is paramount. This is precisely where the crawler harness shines, offering a distinct advantage over many other presentations.
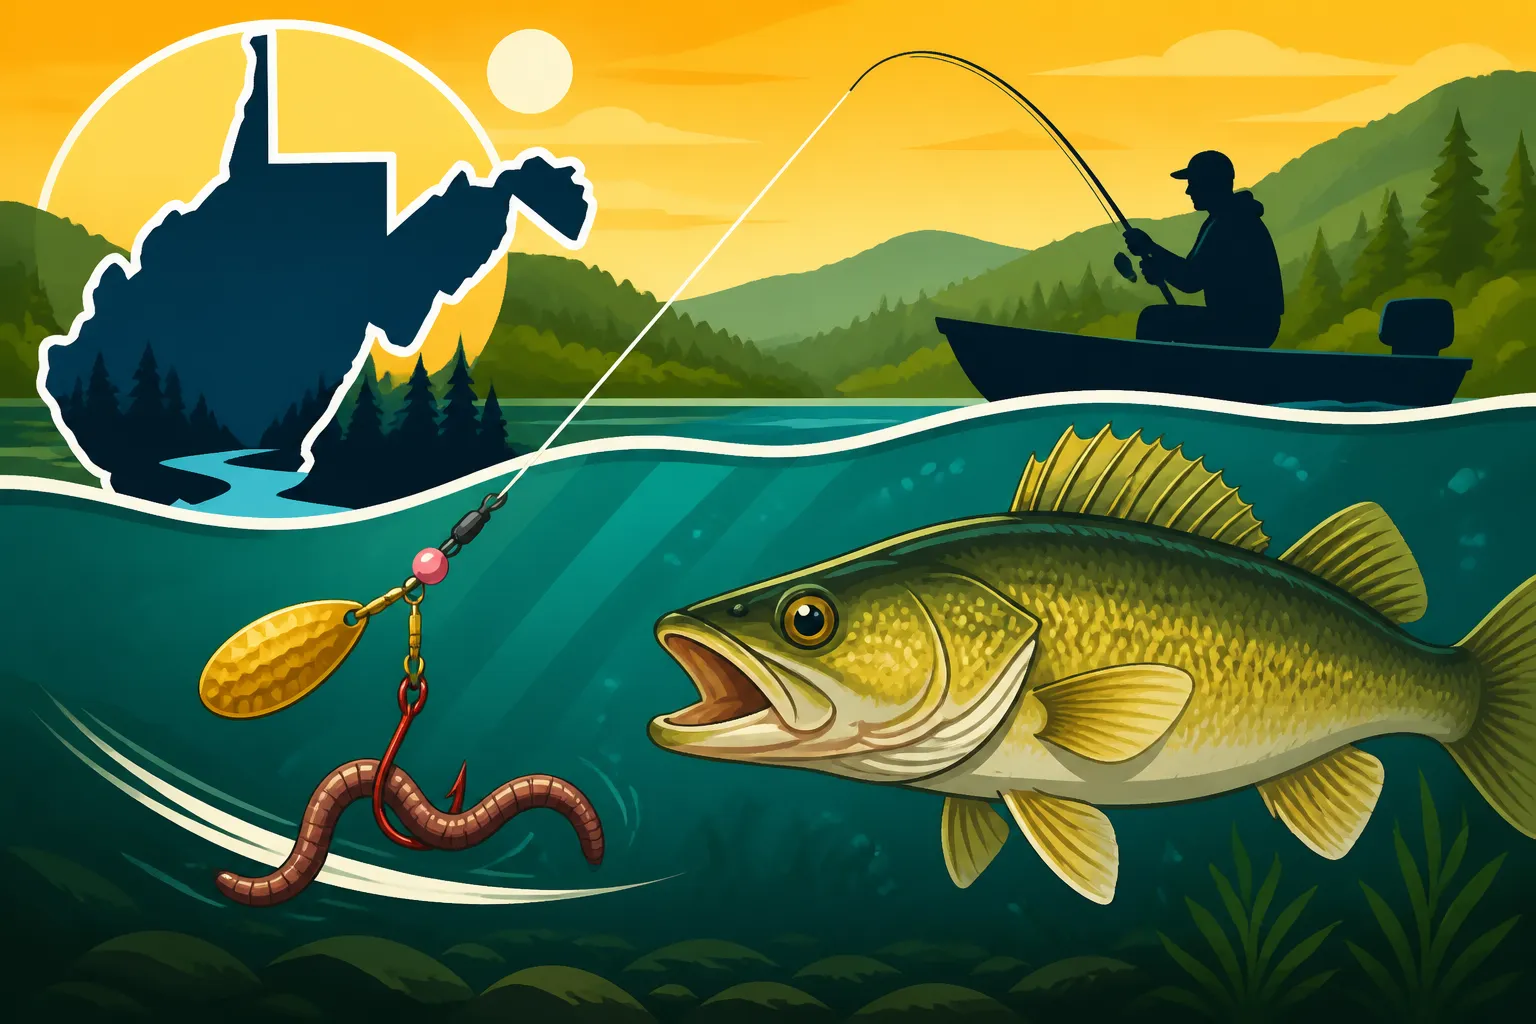
Think about it: a live nightcrawler, undulating naturally through the water, is an irresistible meal for a walleye. The harness itself adds flash and vibration, mimicking a struggling baitfish or simply drawing attention to the juicy worm. This combination of sight, scent, and motion is a powerful trifecta, often triggering bites when other lures fail. It's not just about getting a walleye to see your bait; it's about making them want to eat it.
This technique is incredibly versatile too. Whether you're targeting big walleye in the sprawling waters of Summersville Lake or focusing on a specific depth in Tygart Lake, a crawler harness can be adapted to suit. It's a method that consistently puts fish in the boat for seasoned pros and can quickly elevate a beginner's success rate.
The Anatomy of a Crawler Harness
Before we dive into the techniques, let's break down what a crawler harness actually is. It might look simple, but each component plays a vital role in its effectiveness. Understanding these parts will help you choose the right setup and even tie your own if you're feeling adventurous.
A typical crawler harness consists of several key elements: a snell, hooks, beads, and a spinner blade. These are all strung together on a length of monofilament or fluorocarbon line, designed to be attached to your main line via a swivel. It’s a carefully engineered system that creates maximum attraction with minimal effort.
While you can certainly buy pre-tied harnesses (and there are some fantastic options available on Amazon for convenience), knowing the individual components allows for customization. This means you can adjust for water clarity, light conditions, and the specific preferences of the walleye you’re targeting on a given day. Flexibility is key in walleye fishing, and the crawler harness offers plenty of it.
Hooks: Keeping Your Crawler Enticing
The hooks are perhaps the most critical part of a crawler harness, as they're what actually catch the fish! Most harnesses use two or three single hooks, snelled in sequence. This multi-hook setup is designed to present the nightcrawler naturally while maximizing your chances of hooking a walleye that might just nip at the tail.
The typical hooks are Aberdeen style, characterized by their long shanks, which help with baiting the worm and provide a bit more distance between the hooks for a better presentation. The hooks are usually a smaller size, often ranging from size 4 to 8, to avoid overpowering the delicate nightcrawler and to ensure a good hookset in a walleye's mouth. Don't be tempted to go too big; a subtle presentation is often more effective.
Placement is crucial here: one hook typically goes through the head of the nightcrawler, and the other (or others) are threaded lightly through the body to keep the worm extended. This allows the worm to stretch out and wriggle, creating that irresistible natural action that walleye simply can't ignore. Dull hooks are a cardinal sin in walleye fishing, so always check their sharpness.
Beads and Spacers: Flash and Flow
Beads serve a dual purpose on a crawler harness: they add visual attraction and act as spacers for the spinner blade. These small, often brightly colored beads are threaded onto the line, usually just in front of the spinner blade. They come in an array of colors – chartreuse, orange, red, green, or even UV-reactive – allowing you to match the hatch or stand out in different water conditions.
Beyond their visual appeal, beads provide a smooth surface for the spinner blade to spin against. Without them, the blade would rub directly against the line, causing friction and potentially damaging your rig, not to mention hindering the blade's action. The number and size of beads can influence the overall profile and buoyancy of the harness, so experimenting with different combinations can be beneficial.
Sometimes, anglers will add a few extra beads to increase the visual footprint or to help the bait ride slightly higher off the bottom. These small details might seem insignificant, but walleye are often triggered by subtle changes in presentation. Having a selection of beads in your tackle box, readily available, is a smart move for any dedicated walleye angler.
Spinner Blades: The Irresistible Flash
The spinner blade is the "bling" of the crawler harness, designed to catch light and create vibration as it moves through the water. This flash and thumping action is what often first attracts a walleye to your bait, acting as a beacon in murky water or drawing attention from a distance. Blades come in a bewildering variety of shapes, sizes, and colors, each with its own unique characteristics.
Common shapes include Colorado (round, wide, creates maximum thumping vibration, spins at slow speeds), Indiana (oval, moderate flash and vibration), and Willowleaf (long, slender, creates less vibration but more flash, good for faster trolling speeds). The choice of blade shape often depends on the trolling speed and desired action. For instance, in colder water, a slower presentation with a Colorado blade might be more effective, while in warmer water, a faster troll with a Willowleaf could be the ticket.
Colors are equally diverse, ranging from polished metallics like silver, gold, and copper to painted finishes in fluorescent greens, oranges, and pinks. Often, a combination of metallic and painted finishes, or even blades with intricate patterns, will be used. Match the hatch, consider water clarity, and don't be afraid to experiment. Sometimes, a subtle change in blade color can make all the difference, transforming a slow day into a memorable one. You can find a vast selection of these on Amazon to stock up your tackle box.
Essential Gear for Fishing a Crawler Harness
While the crawler harness itself is the star of the show, having the right supporting cast of gear will make your walleye fishing experience much more enjoyable and successful. You don't need a boatload of specialized equipment, but a few key items are definitely worth investing in. Getting your tackle in order before you even head to the Best Fishing Lakes in West Virginia will save you headaches on the water.
This isn't about buying the most expensive gear, but rather selecting items that are reliable and suited for the task. A good rod and reel combo, appropriate line, and a selection of weights and swivels will cover most of your bases. Remember, success in fishing often comes down to attention to detail and confidence in your setup.
Having a sturdy cooler for your nightcrawlers is also essential. They're delicate creatures, and keeping them cool and fresh is paramount to their effectiveness on the harness. A lifeless, shriveled worm isn't going to entice any self-respecting walleye.
Rod and Reel Setup
For fishing crawler harnesses, a medium-light to medium power spinning or baitcasting rod, typically 6'6" to 7'6" in length, is ideal. The rod should have a fast to moderate-fast action, meaning the tip is sensitive enough to detect subtle bites but the backbone is strong enough to handle a feisty walleye. This allows you to feel the delicate "thump-thump-thump" of your blade spinning, and also the slight pause or pressure that indicates a bite.
A good spinning reel in the 2500-3000 size range or a low-profile baitcasting reel with a smooth drag system will pair nicely with this rod. The key is balance and comfort, as you'll often be holding the rod for extended periods while trolling or drifting. A smooth drag is vital for fighting walleye, preventing them from tearing off the hook, especially when they make those last-minute dashes boat-side.
Ultimately, you want a setup that feels good in your hands, allows for long casts if needed, and provides enough leverage to set the hook and fight a fish. If you're looking for a versatile combo, consider something like a medium-light spinning outfit, which can also pull double duty for Jigging for Crappie in West Virginia Lakes or even light bass fishing.
Fishing Line and Leaders
When it comes to fishing line, a good quality monofilament or fluorocarbon main line in the 8-12 lb test range is a solid choice. Monofilament offers some stretch, which can be forgiving when a walleye strikes hard, and it's generally more cost-effective. Fluorocarbon, on the other hand, is nearly invisible underwater, offers less stretch for increased sensitivity, and is more abrasion-resistant, which is a big plus when fishing around rocky bottoms or submerged timber. Some anglers even use a braided main line with a fluorocarbon leader for maximum sensitivity and strength.
A short leader of fluorocarbon, often 18-36 inches, is frequently used between your main line and the crawler harness. This provides an invisible connection to your bait, which can be crucial in clear water, and also adds another layer of abrasion resistance. The leader material should ideally be slightly lighter than your main line, typically 6-10 lb test, to create a subtle presentation and to act as a break-away point if you get snagged, saving your main line.
Remember to regularly check your line for nicks and abrasions, especially after fishing around structure. A small nick can turn into a big problem when you hook into that trophy walleye. Keeping your line fresh and strong is a simple but often overlooked aspect of successful fishing.
Weights and Swivels
Getting your crawler harness down to the walleye's depth and keeping it there requires the right weights. The most common types of weights used with crawler harnesses are bottom bouncers and in-line sinkers. Bottom bouncers are particularly popular for trolling, as their L-shape design helps them bounce along the bottom without snagging as much as traditional weights, keeping your bait right in the walleye's strike zone. They come in various weights, from 1/2 oz up to 3 oz or more, depending on depth, current, and trolling speed.
In-line sinkers, like bell sinkers or pencil weights, are also used, often placed a foot or two in front of the harness. These are simpler but can be more prone to snagging on rocky bottoms. Experimentation with weight size is key; you want just enough weight to maintain bottom contact without hindering the natural action of your harness.
Swivels are another small but mighty component. A good quality ball-bearing swivel should be used to connect your main line (or leader) to the crawler harness. This prevents line twist, which can be a nightmare when using spinner blades, and ensures your blade spins freely and effectively. Many anglers opt for a snap swivel on the main line to quickly change out harnesses. Always choose swivels that are strong enough for the fish you're targeting.
Rigging Your Crawler Harness for Success
Now that we've covered the components, let's talk about putting it all together and rigging your nightcrawler properly. This is where attention to detail really pays off, ensuring your bait looks natural and enticing to a walleye. A poorly rigged worm will spin unnaturally or fall apart, defeating the purpose of the harness.
The goal is to present the nightcrawler in a way that allows it to wriggle and swim naturally, mimicking a live meal. This means not over-hooking it, and ensuring the hooks are spaced correctly to keep the worm extended. It sounds simple, but a little practice makes perfect.
Remember, fresh, lively nightcrawlers are key. Keep them cool and moist in a proper bait container. How to Catch Catfish in West Virginia Lakes might also benefit from fresh bait, but for walleye on a harness, it's non-negotiable.
Attaching the Crawler to the Harness
Properly hooking your nightcrawler is vital for maximum action and minimal tangles. Start by taking your nightcrawler and threading the first hook (the one closest to the spinner blade) through the very tip of its nose or head. Don't go too deep, just enough to secure it. This allows the head to be the leading edge.
Next, extend the nightcrawler along the shank of the first hook. Then, take the second hook and lightly thread it through the mid-section of the worm, just enough to hold it in place without balling it up. If you have a third hook, repeat this process, spacing it so the worm remains stretched out but still has room to undulate. You want the nightcrawler to be straight but not stiff.
The key is to minimize damage to the worm so it stays lively and releases its natural scent. A properly rigged crawler harness will have the worm extended, allowing it to subtly twist and turn in the water, which is exactly what walleye find so appealing. Don't be afraid to adjust the spacing of your hooks on the harness if your nightcrawler is particularly long or short.
Adding Weights and Swivels to Your Main Line
Before you even think about attaching your rigged crawler harness, you need to set up your main line with the appropriate weight and swivel. If you're using a bottom bouncer, thread your main line through the eye of the bottom bouncer, then tie your main line to one side of a high-quality barrel or ball-bearing swivel. The other side of the swivel is where your crawler harness will attach. This setup allows the bottom bouncer to slide freely on your main line, which offers a few advantages.
Firstly, a sliding bottom bouncer means that when a walleye bites, they feel less resistance from the weight, making them more likely to hold onto the bait. Secondly, it helps prevent line twist, especially important when you have a spinner blade constantly rotating. The weight of the bottom bouncer will be determined by the depth you're fishing, the speed you're moving, and the current.
If you're using in-line sinkers, you'll typically tie your main line directly to your swivel, and then attach your weight about 18-36 inches above the swivel on a dropper line. This setup also allows the harness to move freely. Always ensure all your knots are strong and secure. I usually double-check them with a gentle tug after tying.
Techniques for Fishing a Crawler Harness
Once you're rigged up, it's time to put that crawler harness to work! The beauty of this technique is its versatility, allowing you to adapt to different conditions and walleye behaviors. Whether you're in a boat covering large expanses or drifting a promising stretch, the core principles remain the same: slow, steady, and in the zone.
The most common and arguably most effective way to fish a crawler harness is by trolling or drifting. This allows you to cover water efficiently and present your bait at a consistent depth, keeping it right where the walleye are feeding. It's about patience and persistence, letting your bait do the work for you.
Don't forget to keep an eye on your electronics if you have them. A good Best Fish Finder for River Fishing or Best Fish Finders for West Virginia Lakes can tell you if you're in the right depth, whether there's baitfish around, and most importantly, if walleye are present.
Trolling with a Crawler Harness
Trolling is perhaps the most popular and effective way to fish a crawler harness for walleye, especially in larger bodies of water like Summersville Lake or the Ohio River. The goal is to move slowly, typically between 0.8 to 1.5 miles per hour, allowing the spinner blade to turn and the nightcrawler to undulate enticingly. You want just enough speed to get the blade spinning without causing the worm to spin unnaturally.
When trolling, deploy your lines off the sides and back of the boat, using rod holders to keep them steady. Pay close attention to your rod tip; you should see a subtle vibration indicating the spinner blade is working correctly. If the vibration stops, check your bait – it might be fouled or gone. When you get a bite, don't immediately set the hook. Instead, let the fish take the bait for a few seconds, allowing them to fully commit to the nightcrawler, then make a firm, sweeping hookset.
Varying your speed and making subtle turns can also trigger strikes. These changes in direction cause your harness to speed up or slow down, altering its depth and action, which can often be the subtle nudge a finicky walleye needs to bite. Remember, walleye often feed near the bottom, so maintaining bottom contact with your bottom bouncer is usually key.
Drifting for Walleye
Drifting with a crawler harness is an excellent technique when you're exploring new areas, fishing smaller bodies of water, or when walleye are scattered. It allows for a more natural presentation, as your boat moves silently with the current or wind, presenting your bait in a very subtle manner. This is particularly effective on rivers or large flats where the current or wind can do the work for you.
When drifting, use just enough weight to keep your harness on or very near the bottom, feeling for the occasional tap or drag. If you're drifting too fast, consider deploying a drift sock or sea anchor to slow your boat down. This is crucial for keeping your bait in the strike zone longer and allowing the walleye to track it down. As with trolling, keep an eye on your rod tip for signs of a spinner working and bites.
Drifting can be incredibly effective when walleye are concentrated in specific areas, like along a drop-off or over a piece of submerged structure. It offers a quieter approach than trolling with a motor, which can be advantageous in clear, calm waters or when fish are easily spooked. Combining drifting with strategic casts into promising pockets can be a deadly combination.
Targeting Specific Depths
Walleye are notorious for being depth-oriented, meaning they often stick to a very specific depth range based on light conditions, water temperature, and baitfish location. Successfully fishing a crawler harness means being able to consistently present your bait at that exact depth. This is where your choice of weight and retrieval technique becomes critical.
For shallower depths (5-15 feet), lighter bottom bouncers or in-line sinkers (1/2 oz to 1 oz) are sufficient. For deeper water (20-40+ feet), you'll need to step up to heavier weights (1.5 oz to 3 oz or more) to maintain bottom contact, especially when dealing with current or faster trolling speeds. Pay attention to your line angle; a steeper angle means you're closer to the bottom, while a shallower angle means your bait is riding higher.
Using a line counter reel can be invaluable for consistently hitting a specific depth or reproducing a successful presentation. Alternatively, paying close attention to how much line you let out and how much weight you're using will help you dial in the right depth. If you're getting bites, repeat that exact depth and presentation! Consider checking out Best Time of Day to Catch Walleye in West Virginia for tips on when walleye might be more active at certain depths.
Common Mistakes and Troubleshooting
Even with the best gear and knowledge, fishing a crawler harness can have its challenges. It's easy to get frustrated when things aren't going your way, but often, the solution is a simple adjustment. Recognizing common mistakes and knowing how to troubleshoot them will turn those frustrating moments into learning opportunities.
From fouled baits to incorrect speeds, many factors can hinder your success. The key is to be observant, constantly evaluate your presentation, and be willing to change tactics when necessary. Walleye are unpredictable, and adapting to their moods is what separates consistent anglers from occasional ones.
Don't be afraid to experiment. Sometimes, the walleye want something just a little bit different than what you've been doing. That's the fun of it, figuring out the puzzle!
Preventing Line Twist and Snags
Line twist is a common nemesis when fishing with spinner blades. If your spinner blade isn't turning freely or your nightcrawler is spinning unnaturally, your line will quickly become a tangled mess. The primary culprit is often a poor quality swivel or one that's too small. Always use a good quality ball-bearing swivel to connect your main line to your leader or directly to the harness. This is your first line of defense against twist.
Another cause of line twist can be a damaged or improperly rigged nightcrawler that causes the entire harness to spin rather than just the blade. Ensure your worm is straight on the hooks and not balled up. If you're experiencing excessive twist, consider adding an extra swivel higher up on your main line.
Snags are an inevitable part of bottom fishing, but you can minimize them. When using bottom bouncers, learn to "feel" the bottom. You want your bouncer to occasionally tap or tick the bottom, not drag heavily. If it starts to dig in, lift your rod tip slightly or momentarily speed up to clear the obstruction. If you do get snagged, try backing up over the snag or shaking your rod tip to dislodge it. Sometimes, a quick, hard jerk can break it free, but be ready for a fish if it moves!
Adjusting Speed and Weight
Finding the "sweet spot" for speed and weight is crucial for effective crawler harness fishing. If you're moving too fast, your nightcrawler might spin unnaturally, and the walleye won't have time to react. Too slow, and your spinner might not be creating enough flash or vibration, and your bait won't cover enough water. The ideal trolling speed typically ranges from 0.8 to 1.5 mph, but this can vary depending on water temperature, clarity, and walleye activity.
Likewise, choosing the right weight is a balancing act. Too little weight, and your harness will ride too high off the bottom, out of the walleye's strike zone. Too much weight, and your bottom bouncer will constantly drag and snag, and the walleye will feel too much resistance. The weight needed depends on depth, current, and speed. You'll know you have the right weight when your bottom bouncer consistently ticks the bottom every few seconds, with minimal snagging.
Don't be afraid to experiment with both speed and weight until you find what works. Start with a moderate speed and weight for the conditions, and then make small adjustments until you start getting bites. Trolling Techniques for West Virginia Lake Walleye can provide even more insights into fine-tuning your speed.
When Walleye Are Finicky: Tips and Tricks
There are days when walleye just seem to have lockjaw, and your tried-and-true crawler harness isn't getting any love. This is when it's time to get creative and make some subtle adjustments. Sometimes, the slightest change can be the difference between an empty livewell and a successful trip.
One common trick is to experiment with different spinner blade colors and sizes. If the water is clear, try more natural metallic colors or smaller blades. In murky water, go with brighter, fluorescent colors or larger, more aggressive blades that create more vibration. Another often-overlooked factor is the color of your beads; a simple swap can sometimes trigger a bite. You might also try adding a small piece of brightly colored plastic worm or a small Berkley Gulp! Alive! grub to the hooks along with your nightcrawler for added attraction and scent, a tactic I've seen work wonders.
Don't forget about scent. While the nightcrawler itself is naturally aromatic, some anglers add commercially available walleye scents to their worms or blades. This can be especially effective in stained water or when fish are sluggish. Finally, consider your presentation: if trolling isn't working, try drifting or even anchoring and fan-casting your harnesses. Sometimes, the walleye just want a different look or retrieve.
Preserving Your Catch
So, you've successfully deployed your crawler harness, overcome the finicky nature of West Virginia walleye, and now you've got a beautiful fish in the boat! Congratulations! But the job isn't quite done. Properly handling and preserving your catch ensures that the walleye you take home will be delicious and fresh for the dinner table. It's about respecting the resource and making the most of your efforts.
Knowing the West Virginia Walleye Daily and Possession Limits is crucial before you even start fishing. Always adhere to the regulations to ensure the sustainability of our walleye populations. Releasing fish that are too small or that you don't intend to keep is a vital part of responsible angling.
From the moment a walleye comes over the side of the boat, quick and decisive action makes all the difference in its quality. Whether you're planning to release or keep, handling the fish with care is paramount.
Handling and Releasing Walleye
If you're practicing catch and release, handling walleye gently and quickly is paramount for their survival. Minimize their time out of the water, and support their body horizontally to avoid internal damage. Wet your hands before touching the fish to protect their slime coat, which is their primary defense against disease.
Use a de-hooking tool if the fish has swallowed the bait deep, or simply snip the line as close to the hook as possible. Walleye have surprisingly sharp dorsal fins and gill plates, so use caution. If you have a good quality landing net with rubberized mesh, it's far gentler on the fish than traditional nylon nets. Once released, ensure the fish swims away under its own power. Sometimes, gently holding it upright in the water for a moment, facing into a slight current, can help it revive.
Remember, walleye populations are a valuable resource, and responsible catch and release practices help ensure there are plenty of fish for future generations of anglers to enjoy. It's a small effort that makes a big difference.
Keeping Walleye Fresh for the Table
If you've decided to keep your walleye for a meal (within the legal limits, of course!), proper care begins immediately. The best way to ensure freshness and flavor is to get the fish on ice as quickly as possible. A cooler filled with ice is an absolute must-have on any walleye fishing trip. Bleeding the fish immediately after catching can also improve the quality of the meat, especially for larger fish. Simply make a small cut at the base of the gills and place the fish in your ice cooler.
Once on ice, the fish should be kept chilled until you're ready to clean them. Filleting your walleye promptly after your trip is ideal. Remove the skin and any dark meat along the lateral line, as this can have a stronger flavor. The beautiful, white, flaky fillets are renowned for their delicate taste, making walleye one of the most sought-after freshwater table fish.
Proper storage of your fillets is also important. Rinse them, pat them dry, and either cook them fresh or prepare them for freezing. Vacuum sealing is an excellent way to prevent freezer burn and keep your walleye tasting great for months. Enjoying the fruits of your labor is a fantastic reward for a successful day of fishing!
| Component | Description | Common Variations | Why It's Important |
|---|---|---|---|
| Hooks | Typically 2-3 single snelled hooks (Aberdeen style) | Sizes 4-8, different gap widths | Secures nightcrawler, maximizes hook-up ratio, subtle presentation |
| Beads | Small, colorful plastic or glass beads | Chartreuse, orange, red, green, UV-reactive, varied sizes | Visual attraction, acts as spacer for blade, creates subtle vibrations |
| Spinner Blade | Metal blade that spins to create flash and vibration | Colorado, Indiana, Willowleaf shapes; silver, gold, painted colors | Primary attractant, mimics struggling baitfish, draws attention in low visibility |
| Leader Line | Monofilament or fluorocarbon line (often 10-17 lb test) | Clear mono, fluorocarbon for invisibility, different lengths | Connects components, resists abrasion, provides specific bait action |
| Swivel | Connects main line to harness or bottom bouncer | Barrel, ball-bearing, snap swivels | Prevents line twist, allows quick harness changes |
| Weight | Bottom Bouncer or In-Line Sinker | 1/2 oz to 3 oz+ for bottom bouncers, various sinker shapes | Gets bait to depth, maintains bottom contact, crucial for trolling/drifting |
Disclaimer
This article is for general informational purposes only and does not constitute professional advice. Laws, prices and regulations vary by location and change over time. Consult a qualified professional for guidance on your specific situation.