Best sonar settings for finding structure on Summersville Lake
Many anglers know the frustration of motoring around a beautiful lake like Summersville, seeing promising water, but feeling completely disconnected from what's happening beneath the surface. It's like having a map to a treasure island but not being able to read the X that marks the spot! This guide is designed to cut through that confusion, helping you master your sonar settings to pinpoint fish-holding structure on Summersville Lake, turning those ambiguous blips into clear targets for more successful fishing trips.
Unlocking Summersville's Secrets with Sonar Basics
Before we dive into specific settings, it's essential to understand the different types of sonar at your disposal. Summersville Lake, with its deep, clear waters, abundant submerged timber, and intricate rock formations, demands a comprehensive approach. Just relying on one type of sonar might leave you missing crucial details, and trust me, those details are often where the fish are hiding. A high-quality fish finder, easily found on platforms like Amazon, is your window into this world, but only if you know how to configure it.
The Power of 2D Sonar
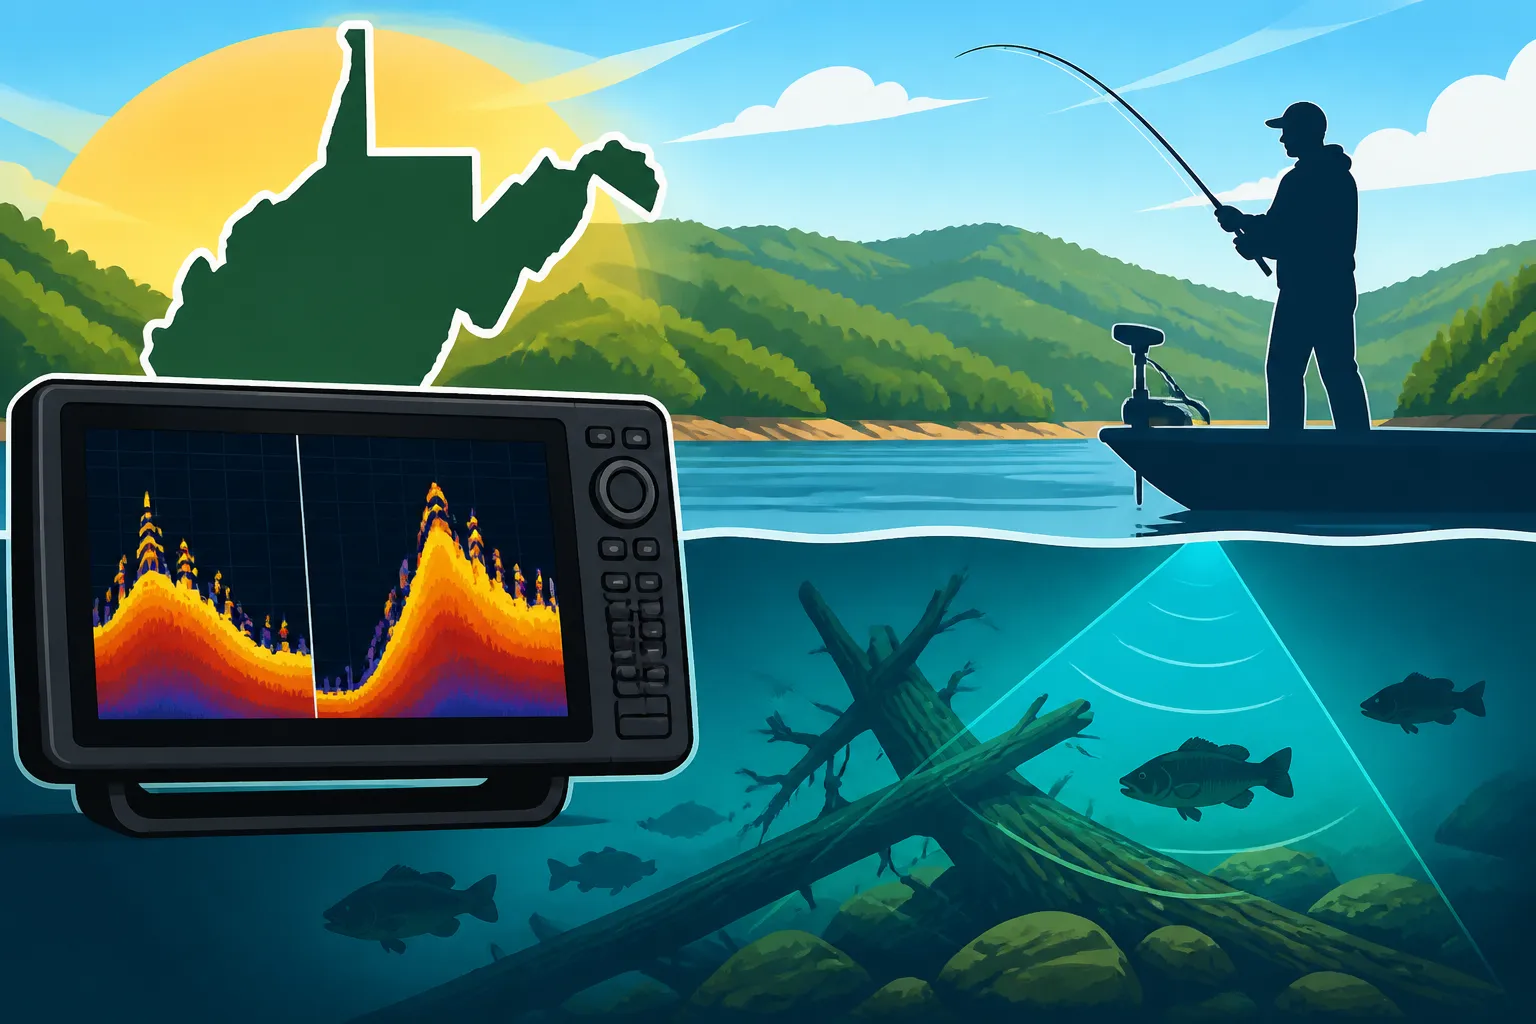
Think of your traditional 2D sonar as your broad-stroke paintbrush. It's the classic view that sends a cone-shaped signal straight down, reflecting off the bottom, fish, and structure. What you see are arcs for fish, solid lines for the bottom, and often a lot of clutter if not properly adjusted. For Summersville, 2D sonar is excellent for general reconnaissance. It helps you quickly identify depth changes, main channel swings, and large schools of baitfish or game fish suspended in the water column.
When you're first exploring a new section of Summersville or simply trying to get a feel for the general topography, 2D sonar is your go-to. It gives you that initial sense of "this looks interesting." You'll see the profile of ledges, the overall slope of a hump, or the jagged returns of a submerged brush pile. The key here is to use it as a starting point, a broad overview that then guides you to deploy your more detailed sonar technologies. Don't expect to pinpoint individual fish tucked tightly into a specific piece of cover with 2D alone, but do expect to find the general areas where those fish might be relating to broader structural elements.
The Clarity of DownScan Imaging
Now, let's zoom in with DownScan Imaging. If 2D sonar is a broad stroke, DownScan is like a detailed photograph of what's directly below your boat. Instead of a cone, it uses a very thin, high-frequency beam to create incredibly sharp, photo-like images. On Summersville Lake, this is absolutely invaluable for identifying individual tree limbs, distinct rock piles, or even individual fish hugging the bottom or suspended within submerged timber.
DownScan excels where 2D often struggles: distinguishing between a tangle of brush and a school of fish in that brush. With DownScan, you can often see the distinct branches of a fallen tree and discern the solid, brighter returns of fish nestled among them. This clarity helps immensely when you're targeting specific species like those found in the Summersville Lake Fishing Guide, especially when they're holding tight to cover. It removes a lot of the guesswork, allowing you to confirm exactly what you're seeing on the screen before you even think about dropping a line. If you mark something interesting on your 2D, switching to DownScan allows for immediate, high-resolution confirmation.
The Horizon with SideScan Imaging
SideScan Imaging is your ultimate scouting tool, like having a bird's-eye view of the lakebed to either side of your boat. It sends out wide, fan-shaped beams horizontally, allowing you to see structure, fish, and contours far off to your port and starboard. For a large, complex lake like Summersville, SideScan is a game-changer for covering water efficiently and finding those hidden gems.
Imagine searching for an old roadbed, a submerged foundation, or an isolated rock hump that doesn't show up clearly on traditional contour maps. SideScan allows you to sweep vast areas, revealing these features that you might otherwise motor right over. It’s perfect for identifying irregular bottom transitions, brush piles, or scattered rock fields that are slightly off to the side, outside your boat's immediate path. For instance, when Summersville Lake Bass Fishing, you'll often find them relating to submerged timber or rocky points that are best located with a wide SideScan sweep. You can use SideScan to quickly locate prime structure, then drive directly over it to get a clearer picture with DownScan and 2D. This combination drastically reduces your search time and increases your chances of finding productive water, making it a powerful tool for exploring one of the Best Fishing Lakes in West Virginia.
Dialing In Your Sonar Settings for Summersville Lake
Now that we've covered the different sonar types, let's get into the nitty-gritty of adjusting your settings for Summersville Lake. This isn't a "set it and forget it" operation; successful sonar use involves dynamic adjustments based on depth, water clarity, and the type of structure you're trying to locate.
Frequency: The Right Wavelength for the Job
Sonar units typically operate on various frequencies. Understanding which one to use is crucial for Summersville's varied depths and conditions.
- High Frequencies (e.g., 200 kHz for 2D, 455/800 kHz for DownScan/SideScan): These provide greater detail and resolution, which is fantastic for pinpointing specific pieces of structure and identifying individual fish in Summersville's often clear water. However, high frequencies don't penetrate as deep. Use 800 kHz for DownScan/SideScan when you're scrutinizing shallower areas or specific targets, as it offers the sharpest images.
- Low Frequencies (e.g., 50/83 kHz for 2D): These penetrate deeper into the water column and cover a wider cone angle, but with less detail. For probing the deepest sections of Summersville, a 50 kHz setting on your 2D sonar can show you the bottom contours and deep-dwelling fish that higher frequencies might struggle to reach. If you're looking for deep-water walleye, for example, a lower frequency can help reveal those elusive deep humps or rock piles, essential for successful Summersville Lake Walleye Fishing.
Many units offer CHIRP sonar, which cycles through a range of frequencies to provide the best of both worlds – excellent target separation and good depth penetration. If your unit has CHIRP, experiment with the medium or high CHIRP ranges for a balanced view in most Summersville scenarios.
Sensitivity and Gain: The Art of Clarity
Sensitivity (often called "Gain" on some units) controls how much detail your sonar unit displays. Too low, and you'll miss faint returns from fish or subtle structure. Too high, and your screen will be cluttered with noise, making it impossible to discern anything useful.
For Summersville's clear waters, you generally want to run your sensitivity as high as possible without introducing excessive clutter. Start by setting it to auto, then gradually increase it manually until you begin to see static or "snow." Back it off just a few notches from there. This allows you to pick up the faintest returns, like a fish barely relating to a rock face or a solitary baitfish. You'll need to adjust this setting dynamically as you change depths or move through areas with different water clarity. Deeper water usually requires a bit more sensitivity, while shallower water or areas with a lot of particulate matter might require a reduction. This fine-tuning is what separates an average sonar user from someone who truly understands the underwater environment.
Range and Depth: Keeping Your Focus
The range setting determines the depth displayed on your screen. While "Auto Range" is convenient, it can cause your screen to constantly adjust, making it harder to track fish or structure in a consistent manner.
For focused structure fishing on Summersville, especially when you know the depth range you're interested in, consider setting your range manually. If you're targeting smallmouth bass on a 30-foot ledge, set your range to display from 0 to 40 or 50 feet. This keeps the relevant depth large and clear on your screen, preventing the unit from unnecessarily trying to display the surface or extreme depths you're not interested in. It’s also incredibly helpful when you're trying to figure out How to Catch Walleye in West Virginia, as walleye often relate to specific depth ranges, and a consistent display makes patterning them much easier. For initial scouting, auto range is fine, but when you're working a specific piece of structure, go manual.
Scroll Speed: Matching Your Pace
Scroll speed dictates how quickly the sonar image moves across your screen. This setting should ideally match your boat's speed.
- Faster Scroll Speed: Use this when you're moving at speed, covering lots of water. It prevents the screen from compressing the image too much, making it easier to identify structure and fish while on the move.
- Slower Scroll Speed: When you're drifting, trolling slowly, or stationary and trying to pick apart a specific piece of cover, slow down your scroll speed. This stretches out the image, giving you more time to analyze details like individual fish within a brush pile or the subtle nuances of a rock vein. It allows for a much more detailed interpretation, especially when you're trying to figure out if that faint return is just a piece of debris or a prime target.
Color Palette: Visualizing the Returns
Most modern sonar units offer a variety of color palettes. While largely a matter of personal preference, some palettes make it easier to distinguish between different types of returns and intensity.
Experiment with different palettes to find one that offers the best contrast for your eyes. Generally, palettes with a wide spectrum of colors, transitioning from light (weak returns) to dark/bright (strong returns), are effective. This helps you easily differentiate between soft bottom, hard bottom, baitfish, and larger game fish. For deep-water structure on Summersville, a palette that highlights subtle changes in density can be incredibly helpful in separating a faint rock pile from the main lakebed.
Noise Rejection and Surface Clarity: Cleaning Up the Screen
These settings are designed to reduce unwanted interference and clutter.
- Noise Rejection: This filters out electrical interference from your boat's engine, trolling motor, or other electronics. Experiment with low to medium settings. Too high, and it might filter out actual fish or structure returns.
- Surface Clarity/Filter: This helps to clean up the "noise" from the surface, such as aeration bubbles or wave action, which can create a cluttered band at the top of your screen. A low to medium setting usually does the trick for Summersville, particularly on windy days.
Specific Summersville Lake Challenges and Solutions
Summersville Lake presents unique challenges for sonar users. Its immense depth in places, coupled with significant submerged timber from its reservoir origins and often very clear water, means you'll need to be extra diligent with your settings.
- Deep Water: Use lower frequencies on your 2D sonar for penetration and higher gain settings, but be mindful of clutter. Manual range settings become vital here.
- Submerged Timber: DownScan is your best friend. Maximize its frequency (800 kHz if available) and sensitivity to pick out individual limbs and fish tucked within. Slow your scroll speed when investigating.
- Clear Water: Higher frequency settings on DownScan and SideScan will yield the best detail. You might run your sensitivity a bit higher than on a stained lake, but be vigilant for clutter. Polarized sunglasses, widely available on Amazon, also help visually when looking into the clear water for shallow targets.
Interpreting the Underwater Language of Summersville
Having the right settings is only half the battle; the other half is understanding what your sonar unit is actually trying to tell you. It's an art as much as a science, and it takes practice to translate those pixels and colors into a mental image of the underwater world.
Distinguishing Fish from Structure
This is perhaps the most common question anglers have. On 2D sonar, fish often appear as arches. A complete arch usually means the fish swam through the entire sonar cone. A partial arch, or a "hook," might indicate a fish on the edge of the cone or one that moved quickly. The thickness and brightness of the arch usually correlate with the size of the fish.
When you're looking at DownScan, fish typically appear as bright, solid blobs or streaks, sometimes with a "comet" tail if they're moving. The key here is distinguishing them from the structure. A fish on DownScan will usually be a distinct, brighter return separated from the darker, more intricate pattern of a submerged tree or rock pile. SideScan will show fish as white dots or streaks, often with a "shadow" that indicates their height off the bottom. If you see multiple white dots with distinct shadows around a submerged stump on SideScan, those are almost certainly fish.
Identifying Bait Balls and Thermoclines
Baitfish schools appear as dense, cloud-like masses on your 2D sonar, often suspended in the water column. On DownScan, they look like tightly packed clusters of tiny specs. When you see these, you know you're in an active feeding zone for predator fish.
Thermoclines, which are layers of water with drastic temperature changes, are often visible on 2D sonar as a distinct, hazy line across the screen. Below the thermocline, oxygen levels often drop, and fish prefer to stay above or within this layer during warmer months, which is crucial information for finding fish in West Virginia Fishing Seasons by Month. Recognizing a thermocline helps you understand the vertical distribution of fish in Summersville, guiding your lure presentation to the right depth.
Recognizing Different Types of Structure
The true power of sonar for structure fishing comes from identifying various underwater features:
- Rocks and Ledges: On 2D, these often appear as jagged, hard returns. On DownScan, you'll see sharp, irregular shapes for individual rocks and distinct vertical lines for ledges or bluffs. SideScan will render them as bright, defined areas with contrasting shadows, allowing you to trace a rock vein or a drop-off contour.
- Submerged Timber: 2D sonar will show fuzzy, irregular returns. DownScan is exceptional here, clearly outlining individual tree trunks, branches, and brush piles as distinct, often vertical, structures. SideScan will display them as dark, often elongated shadows, with bright returns at their base, giving you a comprehensive view of a timber field.
- Old Roadbeds and Foundations: These often appear as distinct, elevated lines or rectangular shapes on SideScan, sometimes with associated debris. On 2D and DownScan, they'll show up as subtle humps or harder bottom sections that are different from the surrounding bottom.
- Creek Channels: On SideScan, you'll see a clear delineation where the channel drops off. On 2D, it will be a V-shape or a sudden drop in the bottom contour. These are classic fish highways, especially for How to Catch Smallmouth Bass in West Virginia Rivers and walleye moving between different areas of the lake.
Advanced Sonar Strategies for More Fish
Beyond just interpreting the screen, integrating your sonar with other tools and strategies will elevate your fishing game on Summersville Lake.
Mapping and Waypointing: Memory for Your Hotspots
Modern fish finders often come with detailed mapping capabilities or allow you to load high-definition maps. Use these in conjunction with your sonar. When you identify a promising piece of structure on your sonar, mark it immediately with a waypoint. This is incredibly important for returning to productive structure, especially on a large lake like Summersville. Don't rely on memory alone. This allows you to mark potential fish-holding structure and refer to it later, a critical step for successful West Virginia Fishing Seasons by Month.
Waypoints are your digital breadcrumbs. Over time, you'll build up a library of productive spots – an isolated rock pile, a specific section of a submerged roadbed, a brush pile that consistently holds fish. Many units also allow you to mark different types of waypoints (e.g., "rock," "timber," "fish") to help you quickly identify what's there on subsequent trips. For general accessories or to compare different models, Amazon offers a wide selection of GPS-enabled fish finders and mapping cards.
SideScan for Efficient Scouting
We touched on SideScan's power earlier, but it deserves emphasis in advanced strategy. Instead of driving directly over every possible spot, use your SideScan to cover large areas. Set it to a wide range (e.g., 80-120 feet to each side) and move at a moderate speed (around 3-5 mph). This allows you to quickly locate offshore humps, creek channels, or extensive fields of submerged timber without driving directly on top of them.
Once SideScan reveals a promising anomaly, you can then make a precise turn and idle directly over it with your 2D and DownScan to get a detailed look. This technique is invaluable for finding those less-pressured spots that other anglers might miss because they're only looking directly beneath their boat. It's an efficient way to break down a vast body of water and hone in on high-probability areas, making your search for deep structure for summer walleye much more productive.
Understanding Depth Contours and Topography
Your sonar should always be used in conjunction with a good contour map of Summersville Lake. The map gives you the big picture, showing you where channels, humps, and major drop-offs should be. Your sonar confirms their exact location and reveals the finer details.
For instance, if your map shows a point extending into deep water, use your sonar to identify the exact contours of that point, any associated rock piles, and whether fish are actively holding on it. Pay attention to how structure changes with depth. Fish often relate to specific depth breaks, especially during different seasons. A subtle change in contour on your map, when confirmed with detailed sonar, can reveal a fish-holding ambush point.
Seasonal Adjustments for Structure Fishing
Fish relate to structure differently throughout the year. Your sonar use should adapt to these seasonal changes:
- Spring: Fish often move shallower, relating to warmer, sun-exposed points and flats with brush. Use SideScan to find these shallow cover elements and DownScan to pick out fish.
- Summer: Fish often retreat to deeper, cooler water, relating to deep ledges, humps, and timber, or suspending over deep channels. This is where your deep-water 2D frequencies and careful sensitivity adjustments become critical. Whether you're after walleye or smallmouth, dialing in your sonar for deep structure is a game-changer.
- Fall: Fish may move back shallower as water temperatures cool, often gorging themselves on baitfish around prominent main lake points and creek channel bends. Use SideScan to find bait concentrations and the structure they're relating to.
- Winter: Fish become lethargic and often congregate in deep, isolated structure or slow-moving creek channels. Fine-tune your sonar to pick out these tightly grouped, less active fish.
By consciously adjusting your sonar settings and interpretation based on the season and the fish's likely behavior, you'll dramatically increase your chances of finding them on Summersville Lake. Remember to familiarize yourself with West Virginia Black Bass Limits and the New River Slot Limit to ensure you're fishing responsibly and within regulations.
Sonar Setting Quick Reference for Summersville Lake
This table provides a general starting point for your sonar settings. Remember, these are guidelines, and constant adjustment based on real-time conditions is the hallmark of a successful sonar operator.
| Setting | Recommendation for General Structure Finding | Recommendation for Deep Water (>40 ft) | Recommendation for Clear Water |
|---|---|---|---|
| Frequency (2D) | 200 kHz (for detail) | 83/50 kHz (for penetration) | 200 kHz (for resolution) |
| Frequency (Down/Side) | 455 kHz (balanced) | 455 kHz (balanced) | 800 kHz (for max detail) |
| Sensitivity/Gain | Auto, then fine-tune up to 80-90% | Adjust based on depth, avoid excessive clutter | Higher (70-95%) but carefully manage clutter |
| Range/Depth | Auto for scouting, Manual for specific depths | Manual, set to slightly beyond maximum depth | Auto, or Manual if targeting specific depths |
| Scroll Speed | Matches boat speed (medium to fast) | Medium to slow for detailed interpretation | Medium to fast for covering ground, slow for detail |
| Color Palette | Personal preference, high contrast palettes often best | High contrast to distinguish faint returns | High contrast to highlight subtle details |
| Noise Rejection | Medium | Medium to High | Medium |
| Surface Clarity | Low to Medium | Low | Low to Medium |
Disclaimer
This article is for general informational purposes only and does not constitute professional advice. Laws, prices and regulations vary by location and change over time. Consult a qualified professional for guidance on your specific situation.